Metal Piping vs Plastic Piping

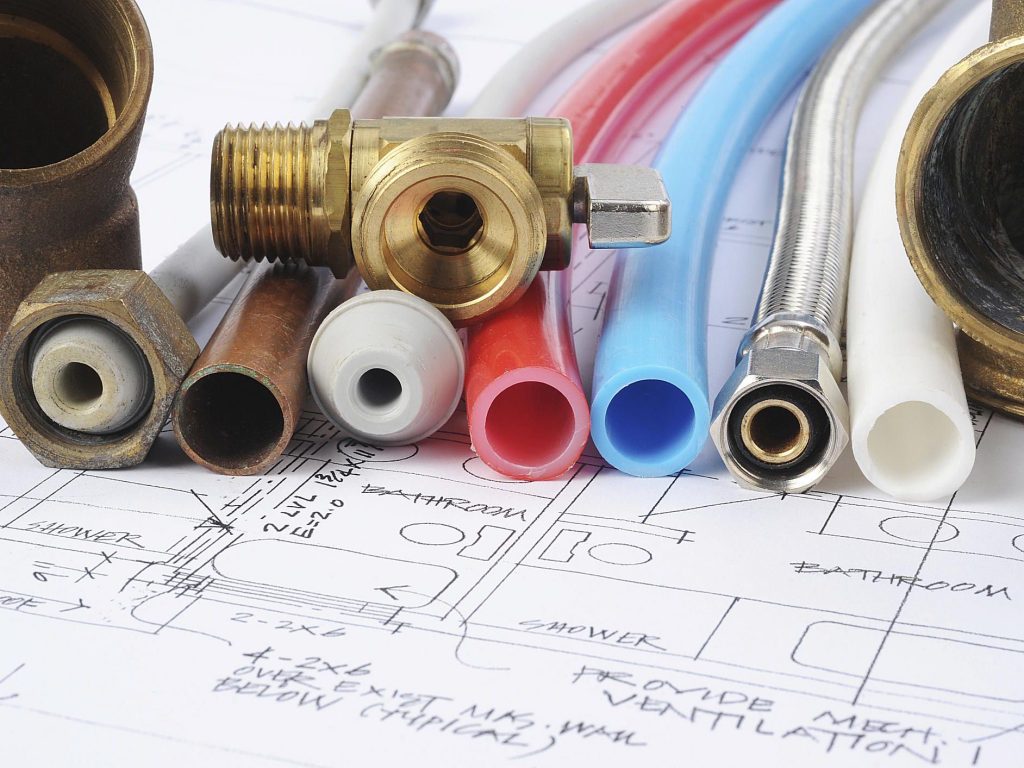
When planning your next plumbing project, you need to examine the numerous kinds of pipelines for the job. Although stainless steel and brass tubing could be used, many projects will be completed with galvanized metal, copper tubing, or some sort of plastic pipelines for plumbing applications.


Lead pipelines and lead solder used on copper pipelines have actually been outlawed considering that 1986, so any new pipes projects should not cause more issues with lead poisoning, although some kinds of plastic might absorb chemical contaminants coming from the water supply. According to Chemical & Engineering News, all kinds of pipe materials can impart taste and odors to drinking water, which frequently can be alleviated by flushing the system.

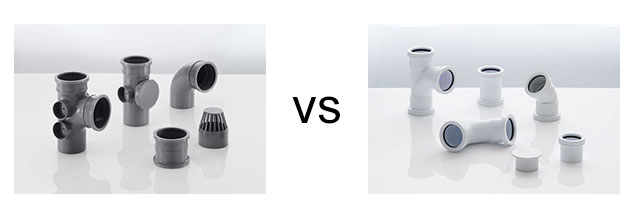
Benefits of Plastic Pipe

Plastic piping can be made of PVC (polyvinyl chloride), CPVC (chlorinated polyvinyl chloride), or PEX (cross-linked polyethylene). In general, the plastic pipeline doesn’t rust or corrode, is light in weight, easy to cut and easy to sign up with– no welding required.


PVC piping is an excellent, inexpensive option for many plumbing tasks. It is easy to install, with a series of various techniques for joining, such as clamps, mechanical couplings, or solvent welding. PVC outside lines can be buried, though they may need additional care to avoid collapse. The main downside of using PVC piping is that it can’t hold up against high temperatures. This suggests you can’t utilize it for hot water lines and it’s not ranked for drinking water, due to possible heat destruction of the plastic.


CPVC pipeline has all the benefits of PVC pipe, plus the included chlorine gives it a higher heat resistance. It is likewise rated for drinking water, and is versatile, fire-resistant, and well insulated to prevent energy loss for either hot or cold water.


PEX tubing resists high heat and is frequently used for glowing hot water heating unit and drinking water lines, though it can’t be straight connected to a warm water heating system and requires a short area of copper tubing in between. It is extremely versatile, so it can be quickly installed through walls and around corners. PEX lasts for years and endures freezing temperature levels well, resisting fractures due to freezing and thawing of water in the lines.

Advantages of Metal Pipe

Historically, the majority of piping was made from brass, copper, cast iron, or some other metal. Brass and copper have innate rust resistance, which makes them outstanding choices, however even these have seen issues when the pipes begin to age over decades, often due to lead in the solder used to link them.


One of the most widely used materials on Earth, steel provides outstanding strength, durability, and toughness. It is a versatile, cost-effective solution for water/sewer pipes and pipeline systems.

Galvanized Steel Pipe vs. Black Steel Pipe

Galvanized steel pipeline features a protective zinc coating that helps avoid deterioration, rust, and the accumulation of mineral deposits, consequently extending the pipe’s life expectancy. The galvanized steel pipeline is most typically used in plumbing and other water-supply applications. In addition, galvanized pipes are a lower expense option to steel, and can attain rust complimentary defense for up to 30 years while maintaining similar strength with a resilient surface covering.


Black steel pipeline contains a dark-colored iron-oxide covering on its entire surface area and is used for applications that do not require galvanization security. The black steel pipeline is used mainly for carrying water and gas in rural and city areas and for providing high-pressure steam and air. It is typically utilized in a fire lawn sprinkler thanks to its high heat resistance. Black steel pipeline is likewise popular for other water transfer applications, including drinkable water from wells, as well as in gas lines.

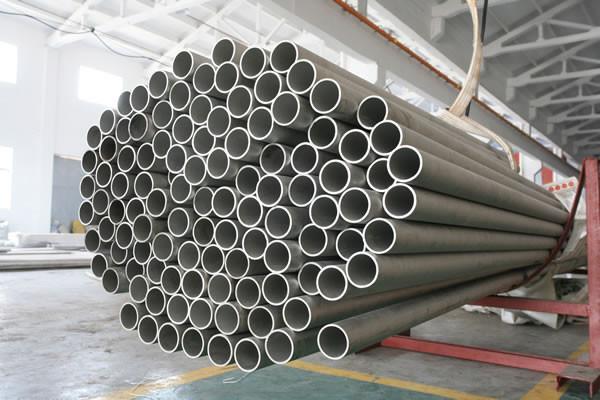
304 Stainless Steel Pipe

304 stainless-steel pipelines also can be utilized for transporting liquids. Stainless deals high deterioration resistance, remarkable durability, high strength-to-weight ratio, fair resistance to thermal and electrical conductivity, ease of fabrication, ease of cleaning, and it is non-magnetic and harden-able by cold working.

Brass Tube/Pipe

Though brass piping is older material, it’s still utilized today for water supply and drain lines, as well as gas lines. Brass, an alloy made of copper and zinc, is extremely resistant to deterioration, and as long as a lead-free brass alloy is chosen, it must be safe for drinking water. Because it is a relatively soft metal, brass tube/pipe can be installed with a tight seal, preventing leaks.

Drain Cleaning Tips

Clear Drain Clogs

Do you remember what truly decreased the drain? There is often more to a clogged drain than satisfies the eye. To clear a blocked drain– in the sink or the bathtub– sometimes it’s just a matter of moving the clog further through the pipeline to the sewage system line. You’ll want to use rubber gloves and maybe a clothing pin (to pinch your nose and obstruct the odor). Here are a couple of tips to aid with typical clogs:

Utilize the old stand-by, the plunger: A plunger is a standard tool utilized for generations that needs just a strong effort and the ability to endure any foul smells. To clean a toilet, it’s everything about pushing through the clog. For sinks and tubs, try for a tight seal of the plunger over the drain followed by duplicated plunges.

Pull out the junk and gunk– Rotting debris, i.e. food or hair, combined with leftover liquids, i.e. saliva or individual cleansing items, can develop a nasty clog in a sink. It’s generally a blockage you see at one time after it develops gradually, slowing the water drainage more every day until nothing cleans down the drain. You can attack this clog with boiling hot water (WARNING: Be very careful with boiling water). If this does not free the blockage, attempt a store-purchased plastic wand or a wire coat wall mount with one end bent like a hook. Push the appropriate end down the drain into the clog and take out the mess.

Apply grandmother’s obstruction recipe– Our seniors have actually always been wise, so follow one of two dishes. One mix requires 1/2-cup baking soda and 1/2-cup table salt poured into the drain. Permit this to treat for 20 minutes or two, then go after with boiling water (WARNING: Be very cautious with boiling water). A 2nd mixture utilizes 1/3-cup baking soda and 1/3-cup vinegar blended together and then put the bubbling mixture down the drain. Let this work for 45 minutes to an hour, then send boiling thin down the drain (WARNING: Be exceptionally cautious with boiling water). Either of these two dishes can break down and clear even the pickiest of clogs.

Get a snake and hold on– No, this isn’t a genuine snake, however a plumber’s tool made from a strong, versatile wire that can be found in numerous lengths of a few feet up to numerous feet rolled into a giving drum. A much shorter snake is offered at any hardware store. Grab the snake when the clog simply won’t budge, or it is even more down the pipe beyond the reach of a wire wall mount or plastic hair plug cleaner. Just force the snake into the drain to push or separate the obstruction. Run some water to make certain the pipeline is clear.

For the brave and strong– Some sink clogs are simply out of reach or too difficult for standard remedies. Those who want to venture into the world of the plumbing professional can take on the diy project of clearing a sink drain trap. This is the U-shaped pipeline in the cabinet under the sink. Place an empty dollar underneath the trap and at the same time to loosen the nuts at both ends of the pipe using a plumbing technician’s wrench. You require the container beneath the trap since the water and gunk will begin draining prior to you understand it. When the nuts are loosened up, you can flip the trap over and let it drain pipes. Utilize a wire wall mount or old tooth brush to scrub the within the trap tubing and clear as much junk as you can. Rinse the trap with clean water (take it outdoors and hose it down if you can). While you’re under there, scrub and tidy the pipeline that ranges from the drain in the bottom of the sink down to the trap. Reverse the procedure to put everything back together. Switch on the faucet to run some thin down the drain. Any blockage in the trap or drain area ought to be totally free and any nasty odor needs to be gone.

Gravity and common chemicals– Here’s a quick and basic bath tub drain cleaning hack. Follow the baking soda and vinegar mixture above, put it into the bath tub drain, seal the opening with the drain plug/stopper and let it sit for an hour. Now, without removing the drain, turn on the hot water and fill the tub. You have actually developed a pressure power tool in your tub with 50 or more gallons of water and all its weight prepared to hurry down the pipe. After an hour, end in the drain. The common chemicals must have loosened up the clog enough for the water pressure to flush it free in the pipeline. If not, don’t quit. Grab the plunger or the snake and get to work.

We do not suggest utilizing over the counter chemical drain cleaning “fast fixes.” These are alarmingly caustic to the skin and can corrode or fracture your pipes causing more cost than they’re worth. The above treatments and your own muscle power can produce outcomes. With any clogged up the drain, sometimes the strength of a good friend or neighbor might be enough to unseat the blockage and conserve the day.

If nobody around meets the muscle criteria, call a plumbing professional. Whether you need routine maintenance, emergency situation repairs, or any related plumbing service, our professional pipes company is prepared to help 24 hours a day, 7 days a week. You should have the very best plumbing service possible, offered by professional plumbing professionals with the skills and understanding to make it happen. Your residential plumbing or commercial plumbing requires being worthy of quality service from a local business. For all pipes needs in Austin, call the local specialists at Reliant Plumbing today at 512.598.5206.

How To Use a Copper Sheet

Tips For Working With Copper Sheets

Copper sheets are quite flexible in terms of all you can do with it. However, most times they are crafted into kitchen accents, beautiful rustic designs and even various crafts. Due to the materials softness, it is very easy to work with. Our article features some tips on how to use a copper sheets.

Most of the time, crafters go out and purchase as much copper as they want and they easily let the creativity flow. So, no matter if it’s hammering, punching, cutting or even bending an intricate design, copper sheets work exceptionally. Before you’re ready to get down and dirty, it’s best to get a better feel of your sheeting material. And you’ll notice right away that your copper sheet is not only lightweight but very think as well.

Due to this, you’ll need to be extra careful as you begin to handle larger sheets since they can easily bend. And you wouldn’t want to create creases on your material since they as we’ve said before bend easily and it’s not as easy to take unwanted creases off. Before you begin your actual work, you’ll want to ensure that you properly roll your sheeting out on a relatively spacious worktable.

And you’ll also need to keep various tools nearby to work on your project. Next, you’re going to want to cut the appropriate size you want with a pair of snips. And keep in mind that while its easy to use snips in both hands, copper is extremely soft so you’ll need just one. In no time you’ll be zooming through your sheets, so be sure to use a pair of leather gloves since your copper sheet will be quite sharp once you start cutting.

As you start the bending process, you’ll need to work with pliers for smaller pieces or even corners. And since every piece will produce a visible line, you can use a small wedge in order to prevent surface impressions. We’re sure you’re going to go all out and create beautiful designs; so, if you’re interested in joining various pieces, be sure to use a soldering iron and in no time, you’ll be creating joints that add to the already rustic feel of your design.

Many industry experts have also said that this particular technique of joining is absolutely excellent when it comes to crafts that involve replicating a knight’s armor or even his sword. So, be sure to use your gloves since copper is not only sharp on its edges but also an excellent conductor of heat and will soon heat up while you’re soldering. If you’re interested in crafting copper lampshades, you may want to rivet your joints since this gives your finished product some extra added beauty of the olden days in Italy.

Your copper sheets can also work wonders since they add a special Southwestern feel to not only backsplashes but countertops as well. And all you need to do in order to achieve this is simply spread your piece on a flat surface, preferably your worktable and begin to lightly hammer away. If you’ve never heard or thought about it, overlapping hammered indentations look their best in this fashion so be sure to use smaller controlled swings as you create your patterns.

As we conclude, we have just looked at some tips for crafting with copper. Additionally, if you’re settled on creating a piece for your garden, you’ll want to use some clear polyurethane so that your master piece doesn’t discolor when exposed to all the elements. They can be used for table tops, countertops, bar tops and in a wide variety of craft projects. So, all you need to do is select your desired thickness and get to work!